AI UX Prototype for Warehouse Barcode Picking Screens
An AI UX prototype for warehouse barcode picking screens lets your team test a picking flow on real devices before any code is written. This guide shows how to map the flow, design the screens that matter most, and turn them into a clickable prototype your floor staff can review.
Why prototype barcode picking screens before you build
Barcode picking happens under pressure. A picker walks a aisle, scans a bin, confirms a quantity and moves on, often wearing gloves and holding a handheld scanner in one hand. A screen that looks fine on a desk can slow every pick when it is read in a moving aisle.
A prototype lets operations leads, warehouse supervisors and developers test those moments early. You can check whether the bin location is readable at arm's length, whether the quantity keypad is large enough for a gloved thumb, and whether the exception path for a short pick is obvious. Finding these problems on a screen costs minutes. Finding them after rollout costs shifts.
Map the picking flow before drawing anything
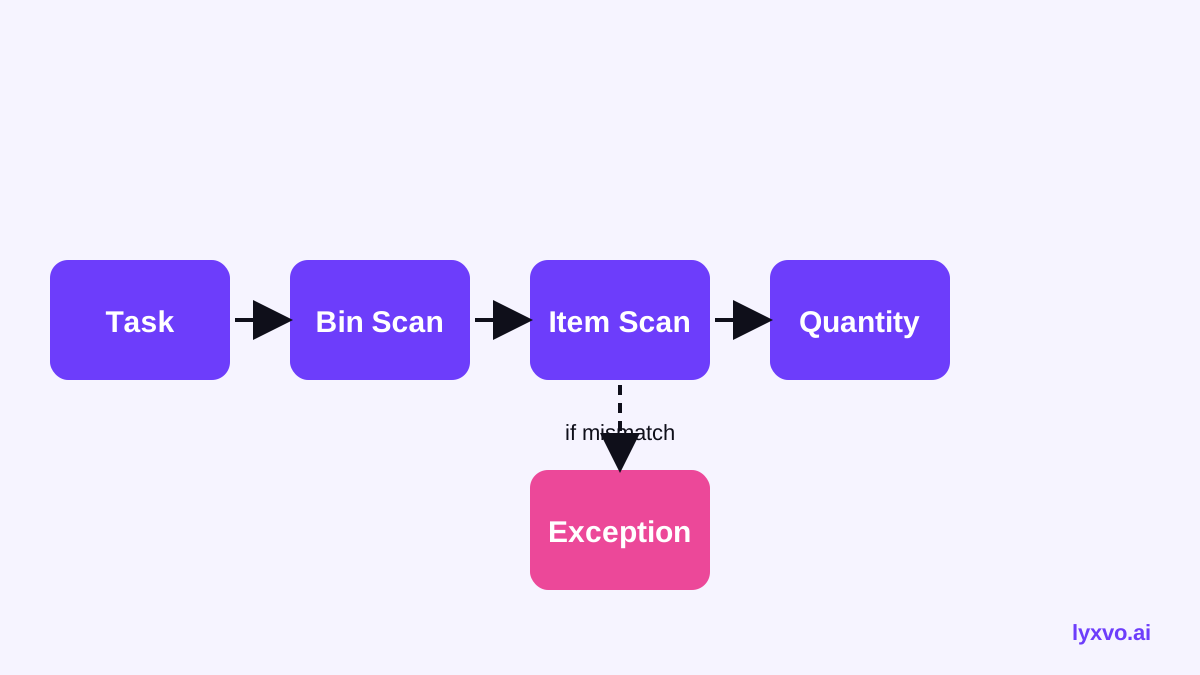
Start with the path a picker follows for one order line. Most barcode picking flows share the same core steps:
- Log in or start a wave or batch
- Show the next task: item, quantity, bin location
- Scan or confirm the bin location
- Scan the item barcode or SKU
- Enter or confirm the picked quantity
- Handle an exception (short pick, damaged item, wrong bin)
- Confirm the line and move to the next task
- Finish the batch and hand off to packing
Write each step as a single sentence and note what the picker sees, what they must do, and what can go wrong. This list becomes the spine of your prototype. Each step should map to one screen or one clearly defined state.
Design the screens that matter most
Not every screen needs full fidelity at first. Focus on the screens a picker touches hundreds of times per shift.
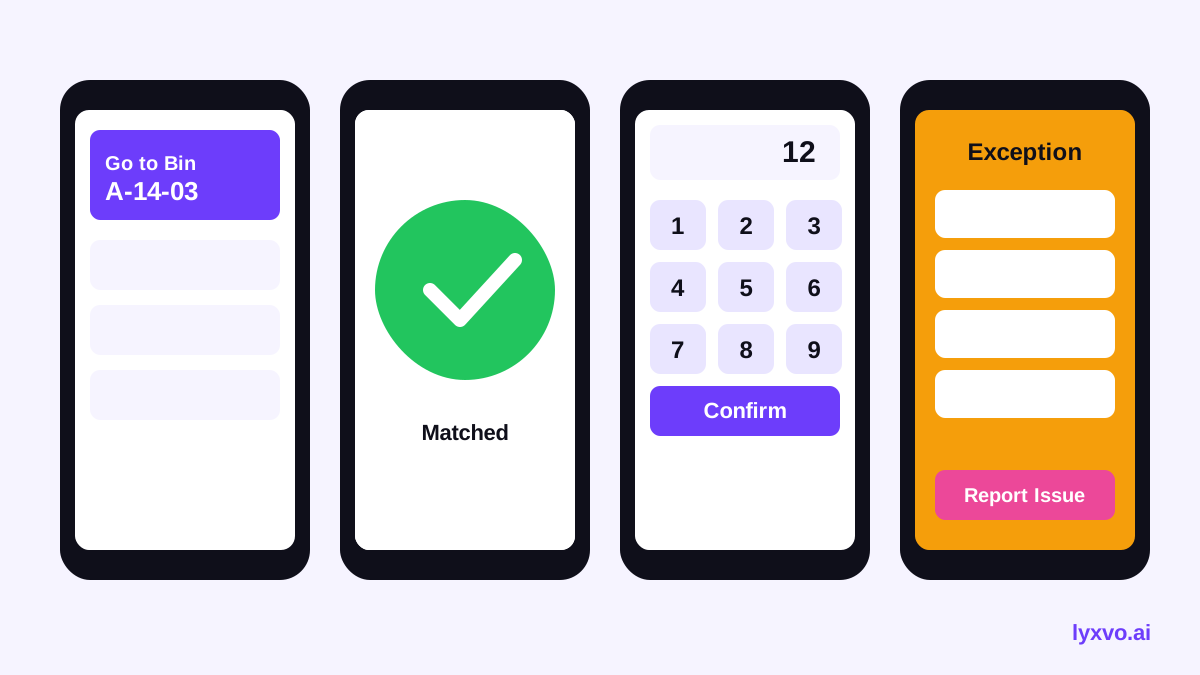
The task screen
This screen should show, in order of importance: the bin location, the item name and SKU, the quantity to pick, and a single primary action. Put the bin location in the largest type on the screen. Use one accent color only for the action button. Avoid showing order metadata that the picker does not need during the pick.
The scan confirmation screen
After a bin scan, confirm the location visually and with a clear color state: matched in one color, mismatched in another, with a text label so color is never the only signal. Keep the confirmation to one tap or no tap when the scan succeeds.
The quantity screen
Use large numeric keys, a default value set to the requested quantity, and a quick "all picked" action. Test with the keypad at the size of a gloved finger.
The exception screen
Short picks, damaged goods and wrong-bin events need their own state. Give pickers a short list of reasons, a photo option if your process uses it, and a path back to the task without losing progress.
Design rules for handheld and tablet
- Keep primary text at least comfortable for reading at arm's length
- Make tap targets large and spaced so a wrong tap is hard
- Use high contrast for aisle lighting, including dark mode if your devices offer it
- Limit each screen to one decision
- Show progress, such as lines remaining in the batch
Note: Test contrast and text size on the actual scanner or tablet your site uses, not only on a laptop. Device screens and lighting vary.
Build a clickable prototype with Lyxvo AI
Lyxvo AI's design agent can plan and design complete app screens for mobile and web, which suits a picking flow that spans handheld and tablet views. You describe the flow in plain language, and the agent proposes the screens. You then refine them in the editor.
A practical workflow:
- Open the AI UI design generator or the AI app design tool and describe the picking app: user roles, the step list above, and the device type.
- Generate the task, scan, quantity and exception screens. Use the Studio link for app designs to start a mobile layout.
- Edit text, colors and element positions directly in the Canva-style editor. Replace placeholder SKUs and bin codes with realistic examples from your warehouse.
- Duplicate the task screen for each state (matched, mismatched, short pick) so the states stay consistent.
- Export the frames as PNG at real size for review with floor staff, or export to Figma (SVG and tokens) if your design team continues in Figma.
- For a developer handoff, export HTML or Flutter and Kotlin Jetpack Compose code as a starting point, then have the team review the prototype against the real scanner SDK.
Available exports include PNG at real size, HTML, Flutter, Kotlin Jetpack Compose, and Figma SVG with tokens. Real-time collaboration lets operations and design review the same file together.
Test the prototype with people who pick
A prototype is only useful if it is tested. Run short sessions with two or three pickers and one supervisor:
- Give each person a realistic task, such as picking three lines from two bins
- Ask them to complete it while standing and holding the device
- Watch where they pause or tap the wrong target
- Ask them to read the bin location aloud from the screen
- Note every exception they encounter and whether the path was clear
Record the sessions and change one thing at a time. Repeat until the common path takes no hesitation.
Prototype checklist
| Area | What to check |
|---|---|
| Flow | Every step from task to batch completion has a screen or state |
| Readability | Bin location readable at arm's length on the real device |
| Tap targets | Quantity keys and action buttons work with gloves |
| States | Matched, mismatched, short pick and damaged states are all drawn |
| Color | Each state also has a text label, not color alone |
| Lighting | Contrast checked in bright and dim aisles |
| Feedback | Pickers can see progress through the batch |
| Handoff | Screens exported with names matching developer components |
Common mistakes to avoid
- Designing only the happy path and skipping exceptions
- Showing too much order data on the task screen
- Using small text and thin icons that disappear under aisle lighting
- Testing only on a laptop or desktop monitor
- Letting the prototype drift from the real warehouse codes and units
Next steps
Start with the flow list, draft the task and quantity screens, then test them on a real device with real pickers. When the core path works, add the exception and batch screens. You can explore pricing and plan options on the pricing page, and find more how-to guides on the blog.
Try it in Lyxvo AI
Describe it in your own words and the design agent starts on the right flow. Free to start.
Related tool: AI UI design generator for apps and websites
Whole apps and websites are designed with the Lyxvo Engine, rented separately from the design plans; every account can try 2 pages free.