How to Auto Resize One Social Post to All Networks
To auto resize one social post to all networks, you design the post once and then adapt it to each platform's exact dimensions, instead of rebuilding it from scratch for every channel. This saves time and keeps your brand consistent across Instagram, TikTok, Facebook, YouTube, X, LinkedIn, Pinterest, WhatsApp and Threads. Platform specs change over time, so treat the sizes below as a starting point and check each network's current help pages before you publish.
Why one post rarely fits every network
Each social network crops, scales and displays images differently. A square post that looks great in a feed can be cut off in a profile grid, and a horizontal banner may shrink into an unreadable strip on a phone. Text placed near the edges is the most common casualty.
Rather than making nine separate designs, the smarter approach is a single master layout with a clear main message, which you then adapt. Resizing is only fast when the composition is built to move.
Know the formats you actually need
Start with the formats your audience uses. Most brands only need four or five. The table below lists common aspect ratios; confirm exact pixel values on each platform's official guidelines because they are updated periodically.
| Network | Common format | Aspect ratio | Typical use |
|---|---|---|---|
| Feed post | 1:1 or 4:5 | Main feed | |
| Story / Reel | 9:16 | Full-screen vertical | |
| TikTok | Video | 9:16 | Full-screen vertical |
| Feed post | 1:1 or 4:5 | Main feed | |
| YouTube | Thumbnail | 16:9 | Video cover |
| X | Post image | 16:9 or 1:1 | Timeline |
| Post image | 1:1 or 1.91:1 | Professional feed | |
| Pin | 2:3 | Tall pins | |
| Status | 9:16 | Vertical status | |
| Threads | Post image | 1:1 or 4:5 | Text-first feed |
Step 1: Design one strong master post
Build the core message first. Choose one headline, one supporting line, one image or focal point and one call to action. Keep the important elements in the middle of the canvas, away from the top and bottom edges, where interface buttons and captions often sit.
A simple master checklist helps:
- One clear headline under about 8 words
- One focal image with room to breathe
- Logo in a corner, not the centre
- Brand colours and a single font family
- Call to action in a readable size
Step 2: Create a safe zone
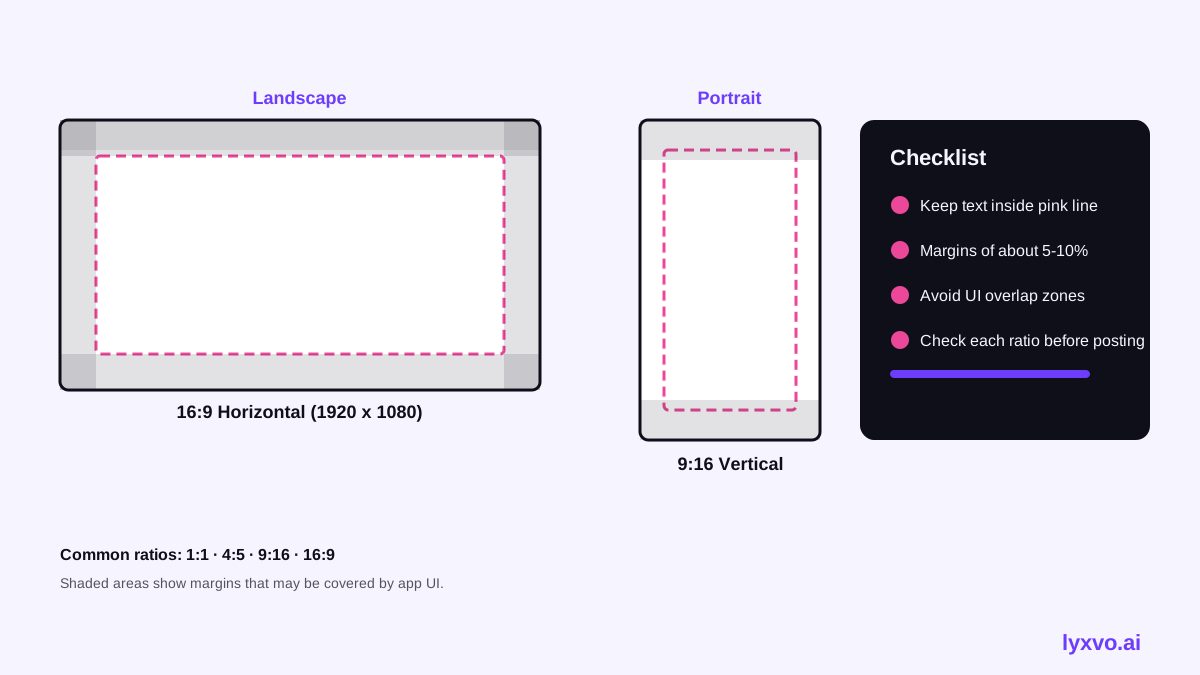
A safe zone is the inner area where your content stays visible on every network. Platform interfaces cover parts of vertical formats, especially the top profile bar and the bottom caption area on Stories, Reels and TikTok. Keep text and logos inside a margin of roughly 10 to 15 percent of the canvas on each side as a practical rule, and adjust as needed.
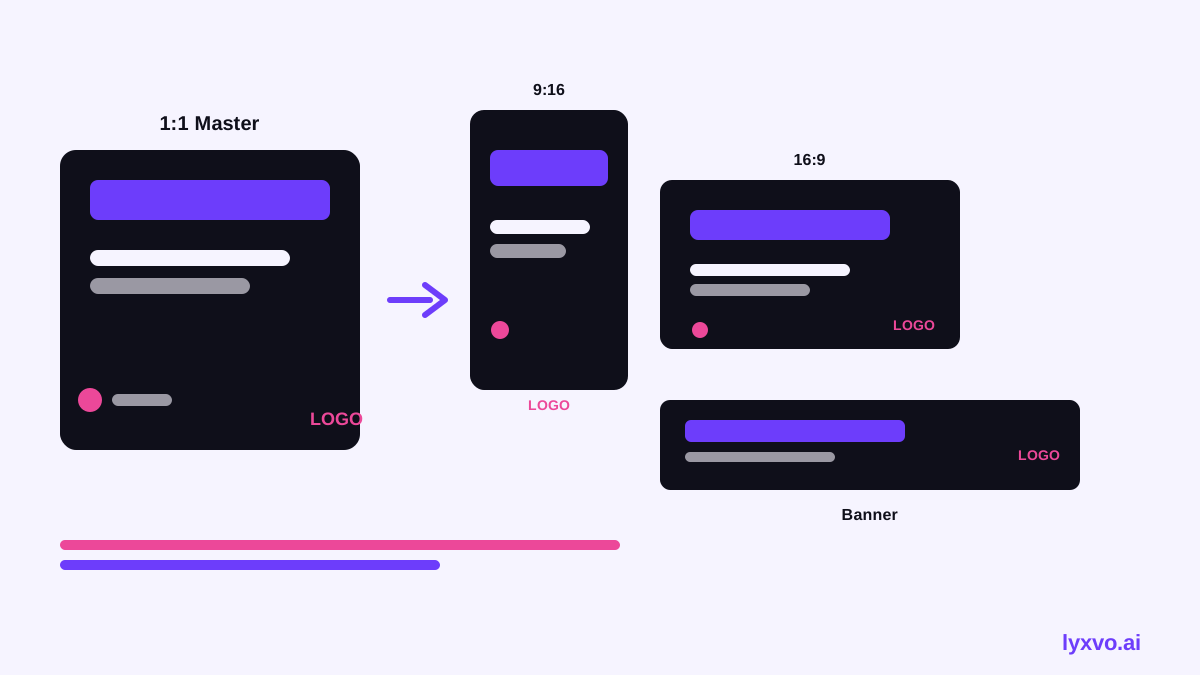
Step 3: Adapt the layout, not just the size
A straight stretch or crop often breaks a design. Good resizing means re-positioning elements for each shape:
- Square (1:1) to vertical (9:16): stack the headline above the image, and extend the background.
- Vertical to horizontal (16:9): move the focal point to one side and place text on the other.
- Any format to a banner: keep only the headline and logo, and enlarge them.
Always re-check the text size after resizing. A headline that works at 1080 pixels wide can become too small on a phone-sized thumbnail.
Step 4: Auto resize in Lyxvo AI
Lyxvo AI's design agent can plan and produce social posts at exact sizes for Instagram, TikTok, Facebook, YouTube, X, LinkedIn, Pinterest, WhatsApp and Threads. You can start from a template or describe the post, then use Magic Resize to generate the other formats from your master design.
A practical workflow:
- Open the AI social media post generator and create your master post.
- Use the Instagram post studio for the square or 4:5 version, and the Instagram story studio for the vertical version.
- Adjust text and colours directly in the Canva-style editor, which lets you edit text, photos and colours without rebuilding the layout.
- Check the safe zones visually, then export PNG at real size for each network.
If your post is a video, you can also use design to video to turn the vertical layout into a short clip. Lyxvo AI supports real-time collaboration, so a teammate can review each size before you publish.
Step 5: Export and publish carefully
Export each size as PNG at its real dimensions. Before you schedule, preview the post in the network's own mobile view if you can, because interface overlays differ from the design canvas. Keep file names clear, such as brand-campaign-ig-4x5.png, so your team can find the right file quickly.
Common mistakes to avoid
- Text at the edges: the most frequent problem, fixed by a safe zone.
- Too many messages: a resized post should still have one main idea.
- Low-resolution images: upscale only when necessary and start from a large source file.
- Skipping a mobile check: what looks fine on desktop may be too small on a phone.
- Forgetting the link or call to action: make sure it survives every crop.
A quick checklist before you publish
- Main message readable at thumbnail size
- All text and logos inside the safe zone
- Correct aspect ratio for each network
- Brand colours and fonts consistent
- Exports saved at real size
- Each platform preview checked on a phone
Start resizing your post today
Once your master design is set, adapting it to every network takes minutes rather than hours. You can start free with Lyxvo Lite, which has a daily limit, and explore ready-made templates to speed up your first campaign.
Try it in Lyxvo AI
Describe it in your own words and the design agent starts on the right flow. Free to start.
Related tool: AI social media post generator for every network